Restaurant
Build your menu
Categories, items, photos, descriptions.
Your menu is the heart of the Restaurant module. Everything else — combos, modifiers, page sections, ordering — builds on top of the menu structure you create here.
What you're building
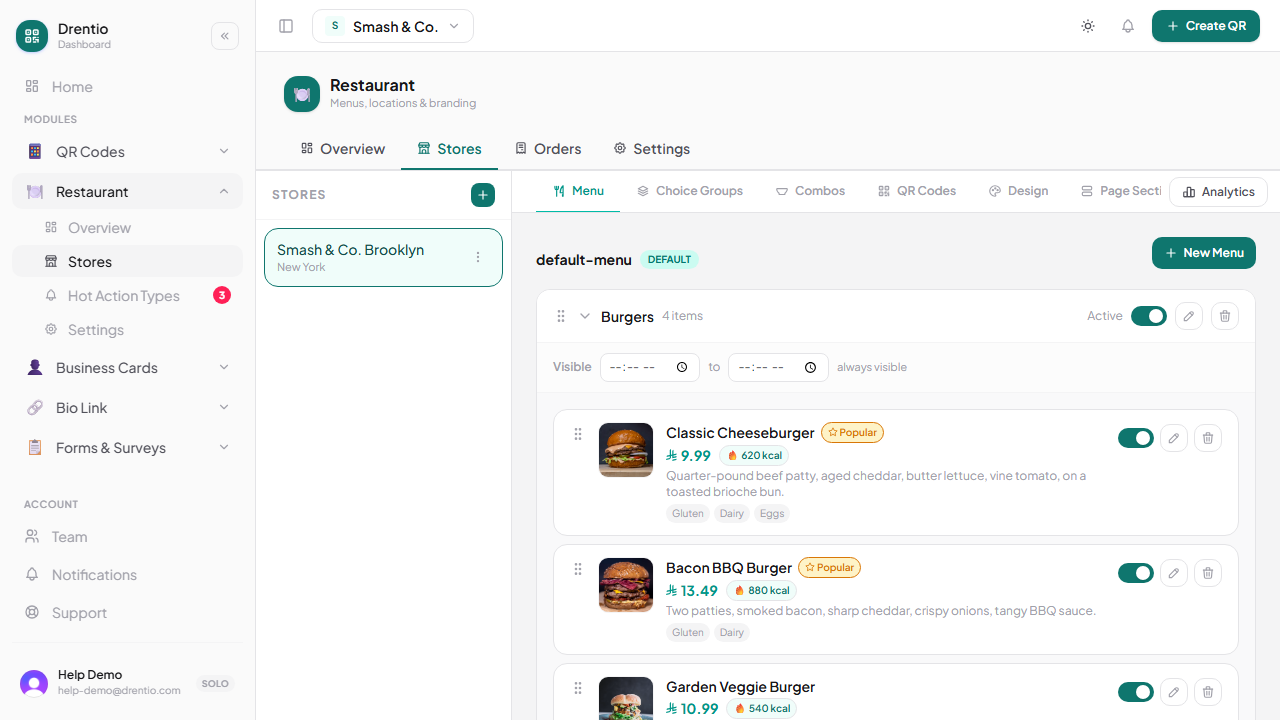
A menu in Drentio is organized as categories (Burgers, Sides, Drinks) that contain items (Classic Cheeseburger, Hand-Cut Fries, Iced Tea). Each item has a name, description, price, photo, allergens, and optional modifier groups.
How to do it
Step 1 — Open the Menu tab
From your dashboard, navigate to Stores → your store → Menu. If it's a brand-new store, the Menu tab will show an empty state with an Add category button.
Step 2 — Add your first category
Tap + Add category and give it a name like "Burgers" or "Mains". Categories appear on the diner-side menu in the order you create them — drag the grip handle on the left of each row to reorder later.
Step 3 — Add items to the category
Inside the category, tap + Add item. Each item needs at minimum:
- Name — what diners see on the card
- Price — your base price in dollars (modifier upcharges add to this)
Optional fields that make a big difference:
- Description — 1-2 sentences. Diners read this before tapping.
- Photo — items with photos get ordered ~30% more than items without
- Allergens — the 14 EU-standard allergens, used by the customer-side dietary filter
Aim for at least 3-5 items per category. Categories with 1-2 items look thin on the diner side. If you're starting with a small menu, combine related items into broader categories ("Mains" rather than separate "Pasta" / "Pizza" / "Salads").

Working with photos
Photos are uploaded directly from the item form — tap the photo area, pick a file, done. Photos are stored on our CDN.
- Recommended format: JPG or PNG, ~800px wide
- Aspect ratio: square (1:1) looks best on the diner card
- Per-item limit: 1 photo on Starter, up to 8 on Pro+
- Diner-side card shows the first photo; tapping the item opens a gallery if there are more
What's next
Once your basic menu is in place, you can layer on:
- Modifiers (size variants, toppings, customization choices) — see Item modifiers
- Combos to bundle items at a single price — see Combo meals
- Themes to style your menu page — see Pick a menu theme